
Why I Built This
Every time I start a new project, the first thing I do is spend days setting up authentication. Login, signup, email verification, password reset, token refresh... it's always the same dance. And honestly? It's exhausting.
I got tired of copy-pasting the same auth code from project to project. So I built a proper starter template that I can just clone and go. And since I spent the time making it production-ready, I figured someone else might find it useful too.
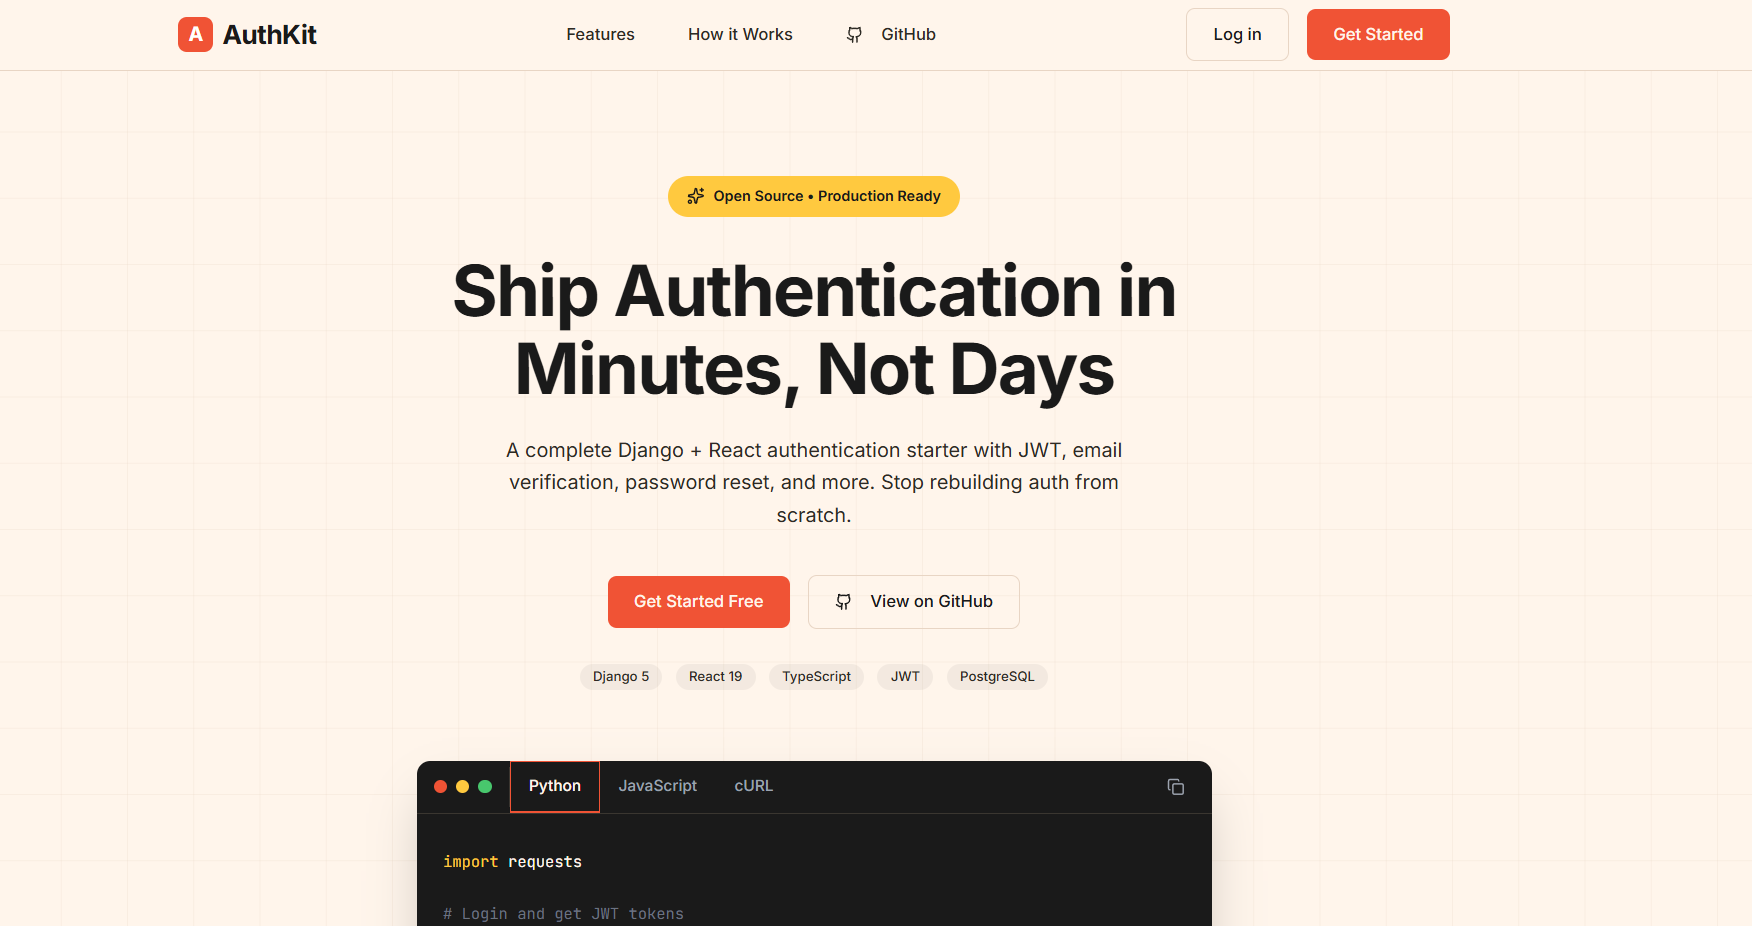
The stack: Django 5.2 + Django REST Framework + SimpleJWT on the backend, React 19 + Vite + TypeScript on the frontend. Nothing fancy, just solid, battle-tested tools that work well together.
Here's the repo: github.com/maniishbhusal/django-react-auth-starter
You can check out the frontend live here: django-react-auth-starter.vercel.app. The backend isn't hosted, so you can just preview the UI - but that's actually useful. You can see how clean the auth forms are and customize the landing page for your use case, whether it's a SaaS product or a personal project.
What You're Getting
Backend (Django/DRF)
- Custom User Model - UUID primary keys (not boring auto-increment IDs) and email-based login
- JWT Authentication - Access tokens, refresh tokens, automatic rotation
- Email Verification - Users must verify their email before they can use the account
- Password Reset - Secure, time-limited reset links sent via email
- Rate Limiting - Built-in throttling so someone can't hammer your API
- Production Security - HTTPS redirect, secure cookies, HSTS headers... all the stuff you forget to add
Frontend (React + Vite)
- React 19 + TypeScript - Type safety from the start
- Auth Context + React Query - Clean state management without Redux overhead
- Axios Interceptors - Automatic token refresh when your access token expires
- Protected Routes - Route guards that actually handle loading states properly
- Tailwind CSS + Radix UI - Clean, accessible UI components
Here's what the User model looks like. Notice how email is the primary identifier, not username:
# api/accounts/models.py
class User(AbstractUser):
    """Custom user model with email as the primary identifier."""

    id = models.UUIDField(primary_key=True, default=uuid.uuid4, editable=False)
    email = models.EmailField(unique=True)
    full_name = models.CharField(max_length=255, blank=True)
    agreed_to_terms = models.BooleanField(default=False)
    agreed_at = models.DateTimeField(null=True, blank=True)

    USERNAME_FIELD = "email"
    REQUIRED_FIELDS = ["username"]
UUID primary keys are a small thing, but they're nicer for security (can't guess user IDs) and work better if you ever need to merge databases.
Why Djoser? (And Not Building Auth From Scratch)
This starter uses Djoser for authentication endpoints. I could've built all the auth endpoints manually - registration, activation, password reset. But why? Djoser gives you battle-tested endpoints out of the box. It handles the boring stuff so you can focus on your actual app.
Here's the Djoser configuration:
# api/config/settings/base.py
DJOSER = {
    "LOGIN_FIELD": "email",
    "USER_CREATE_PASSWORD_RETYPE": True,
    "SET_PASSWORD_RETYPE": True,
    "PASSWORD_RESET_CONFIRM_RETYPE": True,
    "SEND_ACTIVATION_EMAIL": True,
    "SEND_CONFIRMATION_EMAIL": True,
    "ACTIVATION_URL": "activate/{uid}/{token}",
    "PASSWORD_RESET_CONFIRM_URL": "password-reset/{uid}/{token}",
    "PASSWORD_CHANGED_EMAIL_CONFIRMATION": True,
    "USERNAME_CHANGED_EMAIL_CONFIRMATION": True,
    "SERIALIZERS": {
        "user_create": "accounts.serializers.UserCreateSerializer",
        "user_create_password_retype": "accounts.serializers.UserCreateSerializer",
        "user": "accounts.serializers.UserSerializer",
        "current_user": "accounts.serializers.UserSerializer",
    },
    "EMAIL": {
        "activation": "accounts.email.ActivationEmail",
        "confirmation": "accounts.email.ConfirmationEmail",
        "password_reset": "accounts.email.PasswordResetEmail",
        "password_changed_confirmation": "accounts.email.PasswordChangedConfirmationEmail",
    },
}
Let me break down what each setting does:
Login & Password Settings
LOGIN_FIELD: "email"- Users log in with email, not usernameUSER_CREATE_PASSWORD_RETYPE: True- Registration requires password confirmation (password + re_password)SET_PASSWORD_RETYPE: True- Changing password requires confirmation tooPASSWORD_RESET_CONFIRM_RETYPE: True- Same for password reset
Email Settings
SEND_ACTIVATION_EMAIL: True- New users get an activation emailSEND_CONFIRMATION_EMAIL: True- Users get a confirmation after activationPASSWORD_CHANGED_EMAIL_CONFIRMATION: True- Notify users when their password changes (security measure)USERNAME_CHANGED_EMAIL_CONFIRMATION: True- Same for username/email changes
URL Settings
ACTIVATION_URL: "activate/{uid}/{token}"- The path in email links for activationPASSWORD_RESET_CONFIRM_URL: "password-reset/{uid}/{token}"- Path for password reset links
These URLs get combined with FRONTEND_URL to create full links like http://localhost:5173/activate/MQ/abc123...
Custom Serializers
Djoser lets you override the default serializers. I use custom ones to add fields like full_name and agreed_to_terms:
"SERIALIZERS": {
    "user_create": "accounts.serializers.UserCreateSerializer",
    "user_create_password_retype": "accounts.serializers.UserCreateSerializer",
    "user": "accounts.serializers.UserSerializer",
    "current_user": "accounts.serializers.UserSerializer",
}
Custom Email Classes
The default Djoser emails are plain. I override them with custom HTML templates:
"EMAIL": {
    "activation": "accounts.email.ActivationEmail",
    "confirmation": "accounts.email.ConfirmationEmail",
    "password_reset": "accounts.email.PasswordResetEmail",
    "password_changed_confirmation": "accounts.email.PasswordChangedConfirmationEmail",
}
Each custom email class points to an HTML template and adds the FRONTEND_URL to the context so links go to your React app, not Django.
Djoser gives you the endpoints. SimpleJWT handles the tokens. You just wire them together and customize what you need. That's the whole point of this starter - all the wiring is already done.
Getting Started
Backend Setup
Clone the repo and set up the Django backend first:
# Clone it
git clone https://github.com/maniishbhusal/django-react-auth-starter.git
cd django-react-auth-starter

# Set up Python environment
cd api
python -m venv .venv

# Activate it (Windows)
.venv\Scripts\activate

# Or on Mac/Linux
source .venv/bin/activate

# Install dependencies
pip install -r requirements/dev.txt

# Set up environment variables
cp .env.example .env

# Run migrations
python manage.py migrate

# Start the server
python manage.py runserver
Your backend is now running at http://localhost:8000.
Here's the thing that makes local development painless - the development settings use SQLite (no database setup needed) and a console email backend (emails print to your terminal instead of actually sending). Zero external dependencies to get started:
# api/config/settings/development.py
DEBUG = True

ALLOWED_HOSTS = ["localhost", "127.0.0.1"]

# Use SQLite for local development
DATABASES = {
    "default": {
        "ENGINE": "django.db.backends.sqlite3",
        "NAME": str(BASE_DIR / "db.sqlite3"),
    }
}

CORS_ALLOWED_ORIGINS = [
    "http://localhost:5173",
    "http://127.0.0.1:5173",
]

# Email: Use console backend for local development (prints to terminal)
EMAIL_BACKEND = "django.core.mail.backends.console.EmailBackend"
When you register a new user, you'll see the activation email printed right in your terminal. No need to set up Mailgun or SendGrid just to test.
Gotcha: The console email uses quoted-printable encoding, which breaks long URLs with=and line breaks. If clicking the activation link fails, manually reconstruct the URL by removing=at line ends and joining the parts. Or just grab theuidandtokenfrom the URL and test directly in Swagger:POST /api/v1/auth/users/activation/with{"uid": "...", "token": "..."}.
Frontend Setup
Open a new terminal (keep the backend running) and set up React:
# From the project root
cd web

# Install dependencies
npm install

# Set up environment
cp .env.example .env

# Start dev server
npm run dev
Frontend runs at http://localhost:5173. The only environment variable you need is the API URL:
# web/.env
VITE_API_URL=http://localhost:8000
Both servers need to run at the same time. Backend on 8000, frontend on 5173. CORS is already configured to allow this.
API Endpoints & Swagger Documentation
The backend comes with auto-generated API documentation using drf-spectacular. In development mode, you get both Swagger UI and ReDoc:
- Swagger UI:
http://localhost:8000/api/docs/ - ReDoc:
http://localhost:8000/api/redoc/ - OpenAPI Schema:
http://localhost:8000/api/schema/
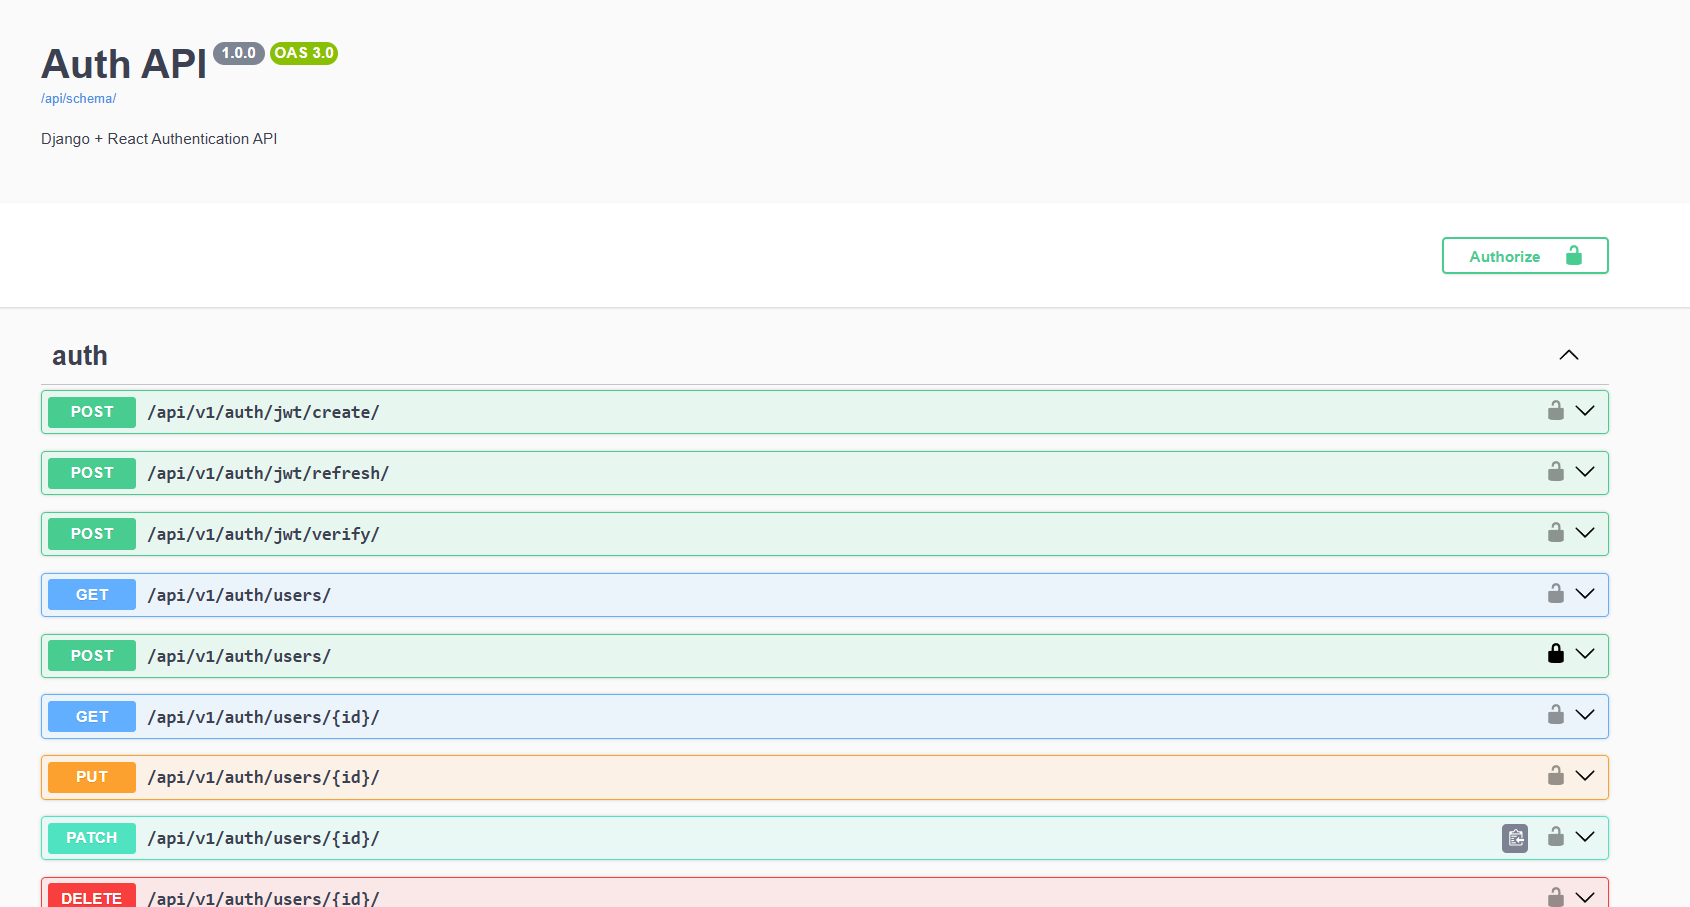
The documentation is only available when DEBUG=True. In production, these routes are hidden:
# api/config/urls.py
from django.conf import settings
from django.contrib import admin
from django.urls import include, path

urlpatterns = [
    path("admin/", admin.site.urls),
    # Auth endpoints (Djoser)
    path("api/v1/auth/", include("djoser.urls")),
    path("api/v1/auth/", include("djoser.urls.jwt")),
    # API endpoints
    path("api/v1/", include("accounts.urls")),
]

# API Documentation - only available in DEBUG mode
if settings.DEBUG:
    from drf_spectacular.views import (
        SpectacularAPIView,
        SpectacularRedocView,
        SpectacularSwaggerView,
    )

    urlpatterns += [
        path("api/schema/", SpectacularAPIView.as_view(), name="schema"),
        path(
            "api/docs/",
            SpectacularSwaggerView.as_view(url_name="schema"),
            name="swagger-ui",
        ),
        path(
            "api/redoc/",
            SpectacularRedocView.as_view(url_name="schema"),
            name="redoc",
        ),
    ]
Available Endpoints
All auth endpoints are prefixed with /api/v1/auth/. Here's the frontend API layer that shows every endpoint used:
// web/src/lib/auth-api.ts
import { apiClient } from "./api-client"
import type {
  RegisterRequest,
  RegisterResponse,
  LoginRequest,
  LoginResponse,
  ActivateRequest,
  ResendActivationRequest,
  ForgotPasswordRequest,
  ResetPasswordRequest,
  RefreshTokenRequest,
  RefreshTokenResponse,
  User,
} from "@/types/auth"

// POST /api/v1/auth/users/
export async function register(
  data: RegisterRequest
): Promise<RegisterResponse> {
  const response = await apiClient.post<RegisterResponse>("/auth/users/", data)
  return response.data
}

// POST /api/v1/auth/jwt/create/
export async function login(data: LoginRequest): Promise<LoginResponse> {
  const response = await apiClient.post<LoginResponse>(
    "/auth/jwt/create/",
    data
  )
  return response.data
}

// POST /api/v1/auth/jwt/refresh/
export async function refreshToken(
  data: RefreshTokenRequest
): Promise<RefreshTokenResponse> {
  const response = await apiClient.post<RefreshTokenResponse>(
    "/auth/jwt/refresh/",
    data
  )
  return response.data
}

// POST /api/v1/auth/users/activation/
export async function activate(data: ActivateRequest): Promise<void> {
  await apiClient.post("/auth/users/activation/", data)
}

// POST /api/v1/auth/users/resend_activation/
export async function resendActivation(
  data: ResendActivationRequest
): Promise<void> {
  await apiClient.post("/auth/users/resend_activation/", data)
}

// POST /api/v1/auth/users/reset_password/
export async function forgotPassword(
  data: ForgotPasswordRequest
): Promise<void> {
  await apiClient.post("/auth/users/reset_password/", data)
}

// POST /api/v1/auth/users/reset_password_confirm/
export async function resetPassword(data: ResetPasswordRequest): Promise<void> {
  await apiClient.post("/auth/users/reset_password_confirm/", data)
}

// GET /api/v1/auth/users/me/
export async function getMe(): Promise<User> {
  const response = await apiClient.get<User>("/auth/users/me/")
  return response.data
}
Request & Response Types
Every endpoint is fully typed. Here are the TypeScript interfaces that match the API:
// web/src/types/auth.ts
export interface User {
  id: string
  email: string
  full_name: string
  agreed_to_terms: boolean
  agreed_at: string | null
  date_joined: string
}

export interface RegisterRequest {
  email: string
  username: string
  password: string
  re_password: string
  full_name: string
  agreed_to_terms: boolean
}

export interface RegisterResponse {
  id: string
  email: string
  full_name: string
}

export interface LoginRequest {
  email: string
  password: string
}

export interface LoginResponse {
  access: string
  refresh: string
}

export interface ActivateRequest {
  uid: string
  token: string
}

export interface ResendActivationRequest {
  email: string
}

export interface ForgotPasswordRequest {
  email: string
}

export interface ResetPasswordRequest {
  uid: string
  token: string
  new_password: string
  re_new_password: string
}

export interface RefreshTokenRequest {
  refresh: string
}

export interface RefreshTokenResponse {
  access: string
  refresh: string
}

export interface ApiError {
  [key: string]: string[] | string
}
For authenticated endpoints, include the JWT token in the header:
Authorization: Bearer eyJhbGciOiJIUzI1NiIsInR5cCI6IkpXVCJ9...Pro tip: Use Swagger UI to test endpoints directly in the browser. Click the "Authorize" button, paste your access token, and you can test authenticated endpoints without Postman.
How the Auth Actually Works
The JWT Dance
When a user logs in, they get two tokens:
- Access token - Short-lived (60 minutes). This is what you send with every API request.
- Refresh token - Long-lived (7 days). Used to get a new access token when the old one expires.
Here's the JWT configuration on the backend:
# api/config/settings/base.py
SIMPLE_JWT = {
    "ACCESS_TOKEN_LIFETIME": timedelta(minutes=60),
    "REFRESH_TOKEN_LIFETIME": timedelta(days=7),
    "ROTATE_REFRESH_TOKENS": True,
    "BLACKLIST_AFTER_ROTATION": True,
}
The ROTATE_REFRESH_TOKENS setting is important. Every time you use the refresh token to get a new access token, you also get a new refresh token. The old refresh token gets blacklisted. This way, if someone steals your refresh token, it'll only work once.
But here's where the frontend magic happens. You don't want to manually check if tokens are expired and refresh them. That's tedious. Instead, we use Axios interceptors to do it automatically:
// web/src/lib/api-client.ts
let isRefreshing = false
let failedQueue: Array<{
  resolve: (token: string) => void
  reject: (error: unknown) => void
}> = []

const processQueue = (error: unknown, token: string | null = null) => {
  failedQueue.forEach((prom) => {
    if (error) {
      prom.reject(error)
    } else if (token) {
      prom.resolve(token)
    }
  })
  failedQueue = []
}

apiClient.interceptors.response.use(
  (response) => response,
  async (error: AxiosError) => {
    const originalRequest = error.config as InternalAxiosRequestConfig & {
      _retry?: boolean
    }

    // If error is 401 and we haven't retried yet
    if (error.response?.status === 401 && !originalRequest._retry) {
      if (isRefreshing) {
        // Queue the request while refreshing
        return new Promise((resolve, reject) => {
          failedQueue.push({ resolve, reject })
        })
          .then((token) => {
            originalRequest.headers.Authorization = `Bearer ${token}`
            return apiClient(originalRequest)
          })
          .catch((err) => Promise.reject(err))
      }

      originalRequest._retry = true
      isRefreshing = true

      const tokens = getStoredTokens()
      if (!tokens?.refresh) {
        clearStoredTokens()
        isRefreshing = false
        return Promise.reject(error)
      }

      try {
        const response = await axios.post(`${API_URL}/auth/jwt/refresh/`, {
          refresh: tokens.refresh,
        })

        const newTokens = {
          access: response.data.access,
          refresh: response.data.refresh || tokens.refresh,
        }
        setStoredTokens(newTokens)

        processQueue(null, newTokens.access)
        originalRequest.headers.Authorization = `Bearer ${newTokens.access}`

        return apiClient(originalRequest)
      } catch (refreshError) {
        processQueue(refreshError, null)
        clearStoredTokens()
        return Promise.reject(refreshError)
      } finally {
        isRefreshing = false
      }
    }

    return Promise.reject(error)
  }
)
The part that confused me at first was the queue. Why do we need it?
Imagine this: your access token expires, and your app makes 5 API calls at almost the same time. Without the queue, all 5 would try to refresh the token simultaneously, creating a race condition mess. With the queue, the first request triggers a refresh, and the other 4 wait patiently. Once the refresh completes, all 5 requests retry with the new token.
The queue pattern is one of those things that seems over-engineered until you hit the race condition bug in production. Then you're very grateful it's there.
Understanding "Remember Me" in JWT Authentication
A common feature in login forms is the "Remember Me" checkbox. The implementation uses different browser storage types based on the user's preference:
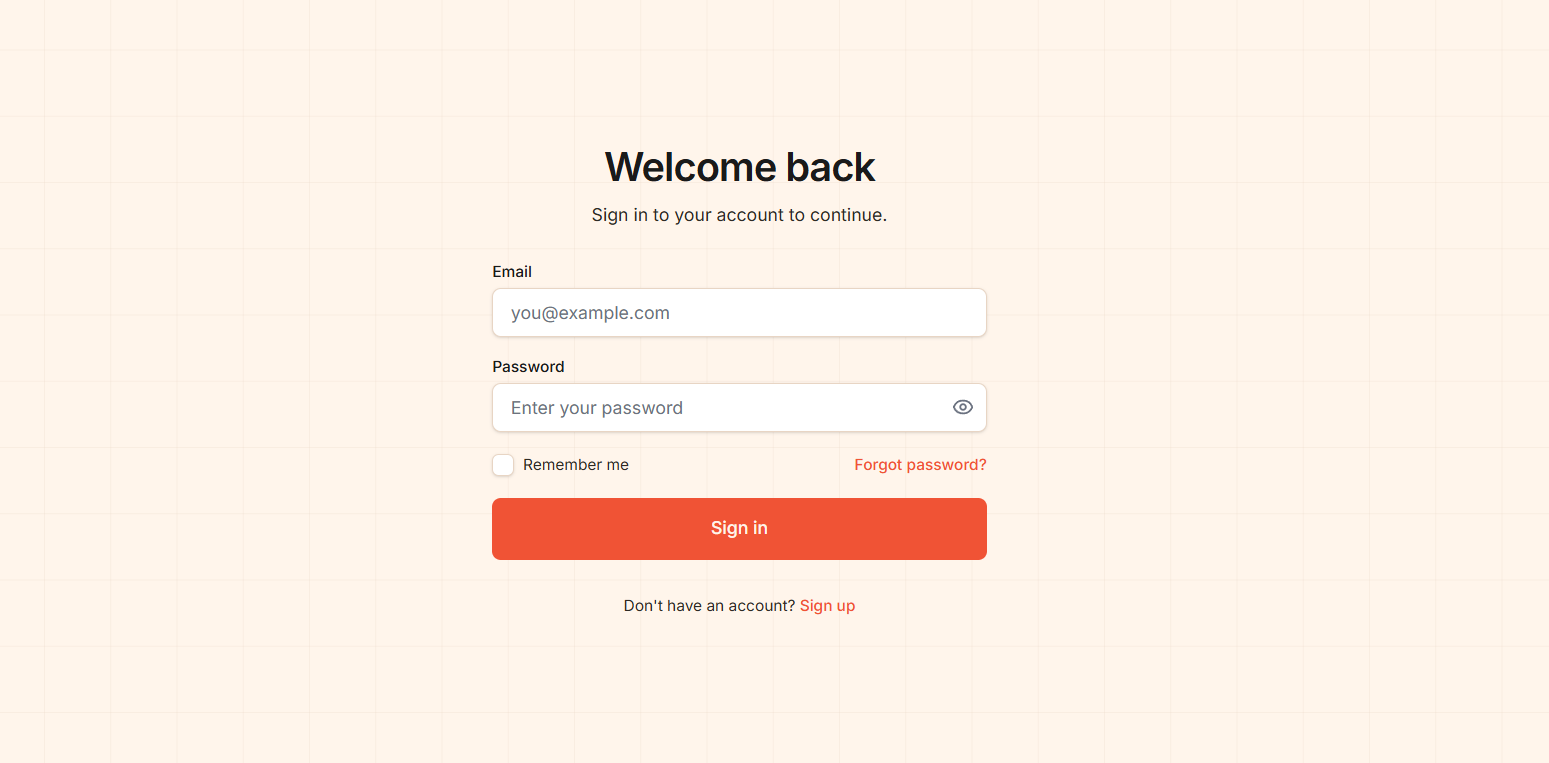
- Session Storage ("Remember Me" unchecked) - Data persists only for the current tab. Open a new tab? Empty storage. Close the browser? Gone.
- Local Storage ("Remember Me" checked) - Data persists across all tabs and survives browser restarts. You stay logged in until you explicitly log out.
Here's how we handle token storage based on user preference:
// web/src/lib/api-client.ts
const TOKEN_KEY = "auth_tokens"
const STORAGE_TYPE_KEY = "auth_storage_type"

export function setStoredTokens(
  tokens: StoredTokens,
  rememberMe: boolean = true
): void {
  // Clear from both storages first
  localStorage.removeItem(TOKEN_KEY)
  sessionStorage.removeItem(TOKEN_KEY)

  // Store based on rememberMe preference
  if (rememberMe) {
    localStorage.setItem(STORAGE_TYPE_KEY, "local")
    localStorage.setItem(TOKEN_KEY, JSON.stringify(tokens))
  } else {
    localStorage.setItem(STORAGE_TYPE_KEY, "session")
    sessionStorage.setItem(TOKEN_KEY, JSON.stringify(tokens))
  }
}
When "Remember Me" is unchecked:
- Tab 1 (logged in): Token in sessionStorage → Dashboard works
- Tab 2 (new tab): sessionStorage is empty → Redirects to login
- Hard refresh in Tab 1: Same sessionStorage → Still works
- Close browser: Token is gone → Must log in again
When "Remember Me" is checked:
- All tabs share the token from localStorage
- Browser restart: Still logged in
Common Pitfall: Token Refresh Bug
Watch out for this bug in the token refresh interceptor:
// ❌ BUG: Missing rememberMe parameter
setStoredTokens(newTokens)  // Defaults to rememberMe=true!

// ✅ FIX: Preserve the user's storage preference
const storageType = localStorage.getItem(STORAGE_TYPE_KEY)
const rememberMe = storageType === "local"
setStoredTokens(newTokens, rememberMe)
Without this fix, when a token refreshes, it will always store in localStorage regardless of the user's original "Remember Me" choice. This means a user who unchecked "Remember Me" would suddenly have persistent sessions after their first token refresh.
Debugging Tip: If tokens appear in unexpected storage, open DevTools → Application tab. Check both Local Storage and Session Storage for "auth_tokens". Look at "auth_storage_type" to see what preference was set.
State Management with TanStack React Query
I used to reach for Redux for everything. Then I realized most of my "state" was just server data - user info, API responses, stuff like that. TanStack React Query handles this way better.
The setup is minimal. In the entry point, we wrap the app with QueryClientProvider:
// web/src/main.tsx
import { QueryClient, QueryClientProvider } from "@tanstack/react-query"

const queryClient = new QueryClient({
  defaultOptions: {
    queries: {
      retry: 1,
      staleTime: 5 * 60 * 1000, // 5 minutes
    },
  },
})

createRoot(document.getElementById("root")!).render(
  <StrictMode>
    <QueryClientProvider client={queryClient}>
      <BrowserRouter>
        <AuthProvider>
          <App />
          <Toaster position="top-right" richColors />
        </AuthProvider>
      </BrowserRouter>
    </QueryClientProvider>
  </StrictMode>
)
For auth operations, I created custom hooks using useMutation. Each hook handles one specific action - login, register, activate, password reset, etc:
// web/src/hooks/use-auth-mutations.ts
import { useMutation } from "@tanstack/react-query"
import { AxiosError } from "axios"
import {
  register,
  login as loginApi,
  activate,
  resendActivation,
  forgotPassword,
  resetPassword,
} from "@/lib/auth-api"
import { useAuth } from "@/hooks/use-auth"
import type {
  RegisterRequest,
  RegisterResponse,
  LoginRequest,
  LoginResponse,
  ActivateRequest,
  ResendActivationRequest,
  ForgotPasswordRequest,
  ResetPasswordRequest,
  ApiError,
} from "@/types/auth"

export function useRegister() {
  return useMutation<RegisterResponse, AxiosError<ApiError>, RegisterRequest>({
    mutationFn: register,
  })
}

interface LoginMutationVariables extends LoginRequest {
  rememberMe?: boolean
}

export function useLogin() {
  const { login } = useAuth()

  return useMutation<
    LoginResponse,
    AxiosError<ApiError>,
    LoginMutationVariables
  >({
    mutationFn: ({ email, password }) => loginApi({ email, password }),
    onSuccess: async (data, variables) => {
      await login(
        {
          access: data.access,
          refresh: data.refresh,
        },
        variables.rememberMe ?? true
      )
    },
  })
}

export function useActivate() {
  return useMutation<void, AxiosError<ApiError>, ActivateRequest>({
    mutationFn: activate,
  })
}

export function useResendActivation() {
  return useMutation<void, AxiosError<ApiError>, ResendActivationRequest>({
    mutationFn: resendActivation,
  })
}

export function useForgotPassword() {
  return useMutation<void, AxiosError<ApiError>, ForgotPasswordRequest>({
    mutationFn: forgotPassword,
  })
}

export function useResetPassword() {
  return useMutation<void, AxiosError<ApiError>, ResetPasswordRequest>({
    mutationFn: resetPassword,
  })
}
The beauty of this approach? Each mutation gives you isPending, isError, error, and isSuccess states for free. The type generics like useMutation<RegisterResponse, AxiosError<ApiError>, RegisterRequest> ensure full type safety - you get autocomplete for both the request and response.
The useLogin hook is special. Notice how it integrates with AuthContext - on success, it calls login() which stores the tokens and fetches the user data.
When the user logs out, we clear the React Query cache to remove any cached user data:
// web/src/context/AuthContext.tsx
import { useQueryClient } from "@tanstack/react-query"

const queryClient = useQueryClient()

const logout = useCallback(() => {
  clearStoredTokens()
  setUser(null)
  queryClient.clear()
}, [queryClient])
The staleTime: 5 * 60 * 1000 setting means data is considered fresh for 5 minutes. During that time, if you navigate away and come back, React Query serves the cached data instantly instead of hitting the API again. Small thing, but it makes the app feel snappy.
React Query for API calls and caching, React Context for auth state. That's it. No Redux, no Zustand, no complexity. Sometimes less really is more.
Protecting Your Routes
The starter includes two route guard components: ProtectedRoute and GuestRoute.
ProtectedRoute is for pages that require authentication (like a dashboard). GuestRoute is the opposite - for pages that only non-authenticated users should see (like login/signup).
// web/src/components/auth/ProtectedRoute.tsx
import { Navigate, useLocation } from "react-router-dom"
import { useAuth } from "@/hooks/use-auth"

interface ProtectedRouteProps {
  children: React.ReactNode
}

export function ProtectedRoute({ children }: ProtectedRouteProps) {
  const { isAuthenticated, isLoading } = useAuth()
  const location = useLocation()

  if (isLoading) {
    return (
      <div className="flex min-h-screen items-center justify-center">
        <div className="h-8 w-8 animate-spin rounded-full border-4 border-primary border-t-transparent" />
      </div>
    )
  }

  if (!isAuthenticated) {
    // Redirect to login, but save the attempted url
    return <Navigate to="/login" state={{ from: location }} replace />
  }

  return <>{children}</>
}
The loading state is important. Without it, you get a flash of the login page even when the user is authenticated - just because the auth check hasn't completed yet. Looks janky.
Also notice how we save location in the redirect state. After the user logs in, we can send them back to where they were trying to go, not just dump them on the homepage.
Usage in your routes is straightforward:
// web/src/App.tsx
<Route
  path="/dashboard"
  element={
    <ProtectedRoute>
      <DashboardPage />
    </ProtectedRoute>
  }
/>
Here's what the dashboard looks like when a user is logged in:
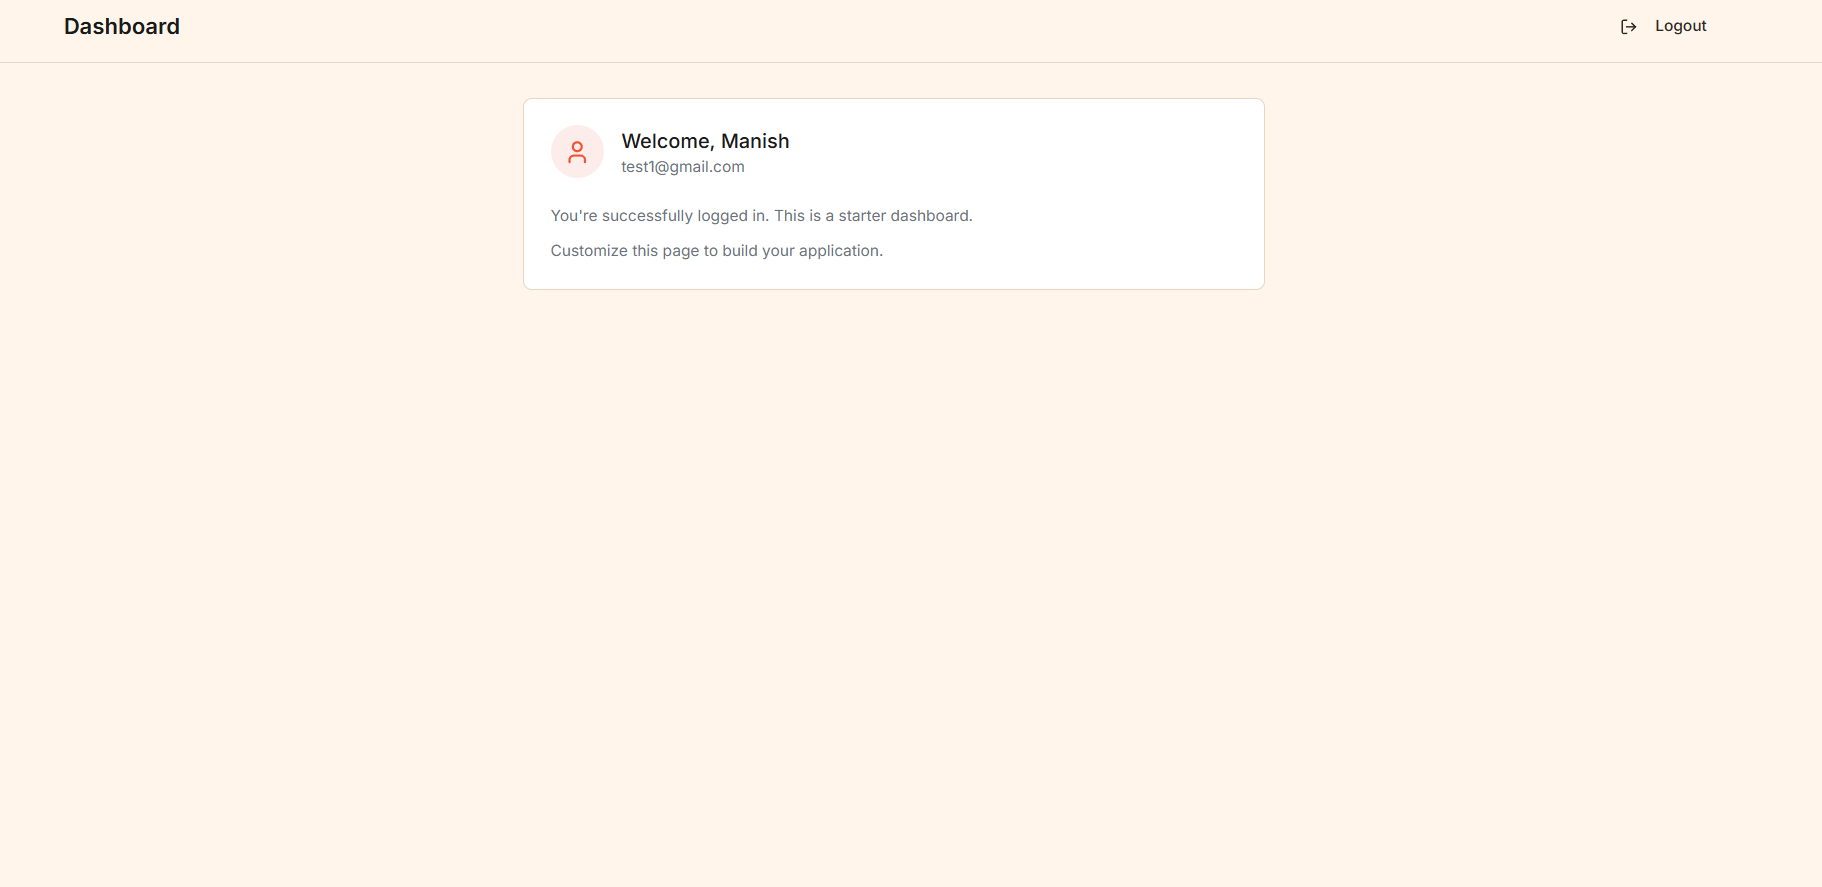
This is just a minimal starter dashboard to show the auth is working. You'll want to replace it with your actual app content - user settings, data visualizations, whatever your app needs. The important parts (auth context, protected routes) are already wired up and ready.
The Email Verification Flow
When a user registers, they can't log in immediately. They need to click a verification link in their email first. This prevents spam accounts and ensures the email is real.
The flow works like this:
- User registers via the React signup form
- Django creates the user (inactive) and generates a unique token
- Django sends an email with a link like:
https://yourapp.com/activate/{uid}/{token} - User clicks the link, which opens your React app
- React app calls the Django activation endpoint with the uid and token
- Django activates the user
The tricky part is making sure email links point to your React frontend, not Django. That's what the custom email classes handle:
# api/accounts/email.py
class ActivationEmail(BaseActivationEmail):
    """Custom activation email with frontend URL."""

    template_name = "accounts/email/activation.html"

    def get_context_data(self) -> dict:
        """Add frontend URL to context."""
        context = super().get_context_data()
        context["frontend_url"] = settings.FRONTEND_URL
        context["activation_url"] = (
            f"{settings.FRONTEND_URL}/activate/{context['uid']}/{context['token']}"
        )
        context["site_name"] = "Your App"
        return context
The FRONTEND_URL setting in your .env file controls where these links point. In development it's http://localhost:5173, in production it's your actual domain.
Taking It to Production
The starter includes separate settings files for development and production. Here's what the production security settings look like:
# api/config/settings/production.py
DEBUG = False

# Security
SECURE_SSL_REDIRECT = True
SESSION_COOKIE_SECURE = True
CSRF_COOKIE_SECURE = True
SECURE_HSTS_SECONDS = 31536000
SECURE_HSTS_INCLUDE_SUBDOMAINS = True
SECURE_HSTS_PRELOAD = True
SECURE_CONTENT_TYPE_NOSNIFF = True
X_FRAME_OPTIONS = "DENY"
All the security headers you need but always forget to add. HSTS forces HTTPS, secure cookies prevent session hijacking over HTTP, X-Frame-Options blocks clickjacking attacks.
Production Checklist
Before you deploy, make sure you:
- Switch
DJANGO_SETTINGS_MODULEtoconfig.settings.production - Set up PostgreSQL (not SQLite)
- Configure a real email provider (Resend, SendGrid, AWS SES, etc.)
- Set
ALLOWED_HOSTSto your domain - Set
CORS_ALLOWED_ORIGINSto your frontend domain - Generate a strong
SECRET_KEY(don't use the example one!) - Set up proper environment variables (don't commit secrets)
For a complete production deployment guide with Docker, Nginx, and free SSL, check out my other post: Deploy Django REST Framework to Production.
The .env.example file shows you everything you need to configure:
# api/.env.example
DJANGO_SETTINGS_MODULE=config.settings.development
SECRET_KEY=your-super-secret-key-change-in-production
DEBUG=True

# Database (PostgreSQL for production)
DB_NAME=authdb
DB_USER=postgres
DB_PASSWORD=your-database-password
DB_HOST=localhost
DB_PORT=5432

# Email (SMTP)
EMAIL_HOST=smtp.resend.com
EMAIL_PORT=587
EMAIL_USE_TLS=True
EMAIL_HOST_USER=resend
EMAIL_HOST_PASSWORD=your-resend-api-key
[email protected]

# Frontend URL (for email links)
FRONTEND_URL=http://localhost:5173
Tests Included
The backend includes a solid test suite using pytest. Tests cover registration, JWT token flow, user profile, and the model itself.
Run them with:
cd api
pytest
The test fixtures make it easy to write new tests:
# api/conftest.py provides:
# - api_client: Unauthenticated API client
# - authenticated_client: Client with valid JWT
# - user: An active test user
# - inactive_user: A user who hasn't activated yet
# - user_data: Valid registration data
Here's what a test looks like:
# api/accounts/tests/test_registration.py
@pytest.mark.django_db
class TestUserRegistration:
    url = "/api/v1/auth/users/"

    def test_register_user_success(self, api_client: APIClient, user_data: dict):
        response = api_client.post(self.url, user_data, format="json")
        assert response.status_code == status.HTTP_201_CREATED
        assert response.data["email"] == user_data["email"]
        assert "password" not in response.data
Nothing fancy, just straightforward tests that verify the API works as expected.
What's Next?
This starter gives you a solid authentication foundation. But there's always more you could add:
- Social Authentication - Google, GitHub, etc. (django-allauth integrates well)
- Two-Factor Authentication - TOTP or SMS-based 2FA
- User Profile Management - Avatar upload, profile editing
- Admin Dashboard - User management interface
But that's the point of a starter - it gives you the basics so you can focus on building the actual features of your app, not reimplementing auth for the hundredth time.
Clone it, customize it, ship it. And if you find bugs or have improvements, PRs are welcome: github.com/maniishbhusal/django-react-auth-starter
Now go build something cool. And when you do, I'd love to hear about it.
Questions? Hit me up on Twitter: @maniishbhusal